%20--%3e%3cdefs%3e%3cstyle%3e%20.st0%20{%20fill:%20%23ff1230;%20}%20.st1%20{%20fill:%20%23fff;%20}%20%3c/style%3e%3c/defs%3e%3cpath%20class='st0'%20d='M49.77,34.93l3.47-5.3,23.2-5.86,4.03-6.07-23.14,5.83,3.55-5.33,23.17-5.84,3.96-6.05-23.07,5.8,3.59-5.52-23.16,5.83,3.68-5.68-19.8,4.98c-2.49.63-4.65,2.16-6.07,4.3l-1.81,2.75,20-5.03c.7-.18,1.49-.1,1.75.21.21.25.09,1.12-.24,1.61l-1.85,2.7-19.34,4.87c-2.48.62-4.64,2.15-6.06,4.29l-1.82,2.75,20.12-5.04c.7-.18,1.53.11,1.64.48.09.31-.06,1.12-.4,1.6l-1.79,2.51-19.21,4.82c-2.51.63-4.69,2.19-6.11,4.36l-1.75,2.69,20.19-5.08c1.67-.25,1.96.77,1.1,2.08l-1.9,2.89,19.51-4.94c1.49-.38,2.88,0,1.87,1.62l-1.88,3.01,24.65-6.19,3.01-5.82-23.07,5.79ZM60.94,13.54c.53-.13,1.35.11,1.52.37.19.28-.02,1.14-.37,1.66l-1.73,2.56-22.57,5.67,3.51-5.31,19.64-4.95ZM30.19,35.24l3.49-5.33,19.75-4.95c1.34-.34,1.92.7,1.23,1.76l-1.83,2.83-22.65,5.7Z'/%3e%3cpath%20class='st1'%20d='M236.44,40.24l22.56-33.95h10.5l-22.56,33.95h-10.5Z'/%3e%3cpath%20class='st1'%20d='M368.54,15.18l5.9-8.88h-52.48l-5.64,8.49-3.45,5.19-5.01,7.54h0s40.4,0,40.4,0l-2.82,4.24h-72.13c-2.23,0-3.07-1.46-1.87-3.27l9.11-13.71h29.5l5.95-8.49h-40.31l-5.64,8.49-9.61,14.46c-.36.55-.67,1.08-.92,1.61-.15.31-.28.61-.39.9-1.52,4.06.3,7.25,4.69,8.2.48.1.99.18,1.54.23.44.04.9.06,1.38.06h85.14l8.46-12.73,5.24-7.89h-40.45l2.95-4.44h40.45Z'/%3e%3cpath%20class='st1'%20d='M198.16,6.32c-.19,0-.37-.03-.56-.03h-60.45l-37.03,26.63h-19.71l18.01-26.63h-10.5l-17.48,26.31c-2.17,3.27.17,7.64,4.09,7.64h28.01l37.22-25.46h6.27l-16.92,25.46h10.51l16.92-25.46h27.83l-.02.04h7.11c1.89.18,2.56,1.55,1.44,3.23l-1.3,1.96c-1.2,1.8-3.98,3.27-6.21,3.27h-25.26l-11.28,16.98h10.5l5.64-8.49h15.69c.48,0,.96-.02,1.45-.06.61-.05,1.22-.12,1.84-.23,5.65-.95,11.72-4.14,15.59-8.2.02-.02.04-.04.06-.06.74-.78,5.18-7.47,5.57-8.39h17.48l-16.94,25.49h10.51l16.94-25.49h14.98l5.65-8.5h-55.64Z'/%3e%3c/svg%3e)
P1 Prototype: How to Drive a Closed-Cockpit Car Without a Side Reference
In the P1 Prototype you lose the car’s side as a reference. See how to replace it with fixed track markers, a calibrated FOV, and data validation.
In the P1 Prototype, you lose the lateral reference you rely on in a GT3 or an open-wheel car: the closed cockpit, the tall bodywork and the hidden front tire take away your view of the car’s edge. The solution isn’t trying to see the side — it’s replacing that reference with fixed track markers and a calibrated FOV that shows the real width of the car on screen.
Why the P1 Prototype hides the side of the car
In a GT3 car or a Stock Car you see the side mirror, part of the hood and the start of the front tire. These three points form a constant visual ruler: by their position on screen, you know how much is left before the curb.
In the prototype, the bodywork rises to shoulder height and the cockpit structure cuts off the lateral view. What’s left is the front windshield and little else. The visual ruler you trained in other cars simply doesn’t exist here.
What replaces the lateral reference
With no bodywork to look at, positioning starts to depend on fixed track markers, not on the car. This changes how you study a corner before driving it.
- Entry curb: the point where the curb changes color or height becomes your apex mark, because it’s always in the same place, lap after lap.
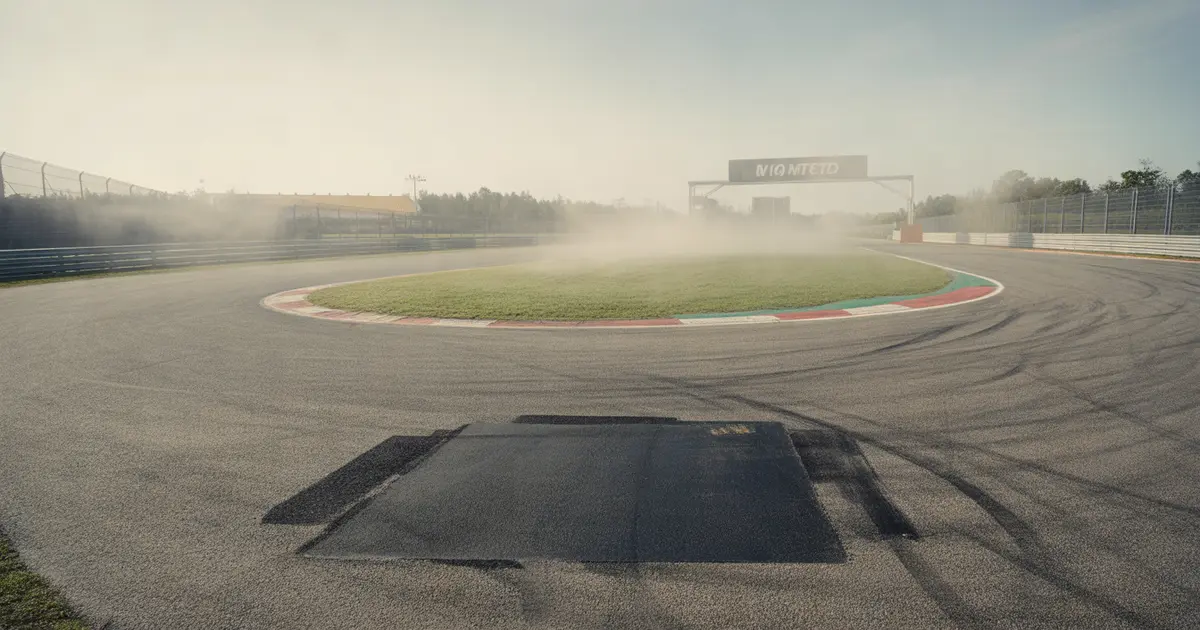
- Asphalt change: patches, concrete joints and darker sections work as a fixed tape measure to calibrate braking and turn-in.
- Braking board: even without the front tire as a reference, the board stays in the same place and serves as a trigger for your foot.
- Grass or wall line: on tracks without a marked curb, the contrast between asphalt and grass plays the same role.
These markers replace the feeling of sensing the side of the car with a fixed visual trigger. It’s the same principle used to train corner entry with early steering input: the decision moves from feel to a reference point.
FOV: the setting that most affects closed-cockpit cars
In an open car, a wrong FOV distorts the lateral ruler but still leaves clues. In the prototype, a wrong FOV removes the only reference left: the width of the windshield.
FOV set too high shrinks the car on screen and makes you turn the wheel late. FOV set too low exaggerates the width and makes you turn earlier than needed — the same effect discussed in why wrong FOV makes you brake early. In the P1 Prototype this mistake costs more because there’s no side reference left to correct the perception.
Before driving the prototype for the first time, recalculate the FOV based on the real distance to your monitor or VR headset. The calculation is detailed in how to calculate the correct FOV and it’s worth redoing car by car, because eye height changes between a GT3 and a prototype.
Comparing the two situations
| Car | Available reference | What replaces it |
|---|---|---|
| GT3 / Stock Car | Mirror, hood, front tire | Little adjustment needed |
| P1 Prototype | Front windshield only | Fixed track markers + calibrated FOV |
How to calibrate in three sessions
Calibrating a reference isn’t about sitting down and just driving. It’s a repeatable process, corner by corner, until the markers become automatic.
- Session 1 — mapping: stop the car at the ideal apex point in each corner and note where the curb sits relative to the hood.
- Session 2 — low-speed repetition: drive at a reduced pace aiming only at the fixed markers, ignoring lap time.
- Session 3 — real-pace validation: raise the pace and check whether the markers still appear in the same place on screen when you brake and turn.
How to confirm in the data that the reference is working
Feeling like you nailed the point isn’t proof. The steering angle channel shows whether you turn in at the same spot on track, lap after lap, or whether the point varies because the visual reference still fails.
A consistent lap has the start of steering input nearly overlapping between attempts. An inconsistent lap shows that start moving back and forth on the distance axis — a sign the driver is still guessing, not aiming at a fixed marker. It’s one of the three channels worth checking first in telemetry.
- 1Stationary mapping
Car stopped at the ideal point, noting where the curb appears relative to the hood.
- 2Slow repetition
Laps at reduced pace aiming only at the fixed track markers.
- 3Pace validation
Real pace, checking if the markers always appear in the same spot on screen.
- 4Data check
Steering angle channel confirms whether the turn-in point became consistent.
Common mistake: compensating with mirrors
Many drivers try to solve the lack of a side reference by looking more at the inner mirror or turning their head in VR to look behind the car. This delays the gaze at the turn-in point and costs more time than the missing lateral reference itself.
The right fix is the opposite: lock your gaze on the fixed track marker early, before the braking zone, and let peripheral vision — not focus — pick up the rest.
In a car with no side reference, you don’t stop losing reference — you trade the car’s reference for the track’s reference.
How Laptics helps validate the calibration
Laptics’ telemetry capture runs on its own while you train the P1 Prototype in Automobilista 2, with nothing to export manually. The AI analysis compares your laps phase by phase and shows whether the start of your steering input is stabilizing as you repeat each corner’s fixed markers. The Driver DNA points out whether the variation in turn-in point is a recurring trait of yours, which helps you know if the problem is the specific corner or the calibration process.
Practical summary
Driving the P1 Prototype without a side reference means trading the car’s reference for the track’s reference, calibrating FOV before driving, and confirming with the steering channel that the turn-in point is truly fixed. Without that trade, the driver keeps feeling unsure of the car until the end of the stint.
Frequently asked questions
Why does the P1 Prototype feel harder to position than a GT3?
Because the closed cockpit and tall bodywork block the view of the front tire and the side of the car, leaving only the windshield as a reference.
Does the game’s default FOV work for the prototype?
Rarely. The default FOV tends to be generic; it’s worth recalculating it based on the real distance to your monitor or VR headset for this specific car.
Can I use the same camera setup from the GT3 in the P1 Prototype?
Not directly. Eye height and cockpit proportions change, so the visual reference point also changes between the two cars.
How long does it take to get used to the lack of a side reference?
It depends on the driver and the track; it usually takes a few mapping sessions until the fixed markers become automatic.
Does VR solve the side reference problem?
It helps because it gives a real sense of depth, but it doesn’t replace mapping fixed markers — the problem still exists even in VR.
How can I tell if the problem is visual reference or car setup?
Compare the steering angle channel between laps: if the turn-in point varies a lot in the same corner, it’s reference; if the car reacts unpredictably even with consistent steering, it’s setup.
Does Laptics provide a ready-made setup for the prototype?
No. Laptics analyzes telemetry and shows where time is being lost, but it doesn’t hand you a ready-made setup or drive for you.
Want to see this in your own telemetry?
Try Laptics for free