%20--%3e%3cdefs%3e%3cstyle%3e%20.st0%20{%20fill:%20%23ff1230;%20}%20.st1%20{%20fill:%20%23fff;%20}%20%3c/style%3e%3c/defs%3e%3cpath%20class='st0'%20d='M49.77,34.93l3.47-5.3,23.2-5.86,4.03-6.07-23.14,5.83,3.55-5.33,23.17-5.84,3.96-6.05-23.07,5.8,3.59-5.52-23.16,5.83,3.68-5.68-19.8,4.98c-2.49.63-4.65,2.16-6.07,4.3l-1.81,2.75,20-5.03c.7-.18,1.49-.1,1.75.21.21.25.09,1.12-.24,1.61l-1.85,2.7-19.34,4.87c-2.48.62-4.64,2.15-6.06,4.29l-1.82,2.75,20.12-5.04c.7-.18,1.53.11,1.64.48.09.31-.06,1.12-.4,1.6l-1.79,2.51-19.21,4.82c-2.51.63-4.69,2.19-6.11,4.36l-1.75,2.69,20.19-5.08c1.67-.25,1.96.77,1.1,2.08l-1.9,2.89,19.51-4.94c1.49-.38,2.88,0,1.87,1.62l-1.88,3.01,24.65-6.19,3.01-5.82-23.07,5.79ZM60.94,13.54c.53-.13,1.35.11,1.52.37.19.28-.02,1.14-.37,1.66l-1.73,2.56-22.57,5.67,3.51-5.31,19.64-4.95ZM30.19,35.24l3.49-5.33,19.75-4.95c1.34-.34,1.92.7,1.23,1.76l-1.83,2.83-22.65,5.7Z'/%3e%3cpath%20class='st1'%20d='M236.44,40.24l22.56-33.95h10.5l-22.56,33.95h-10.5Z'/%3e%3cpath%20class='st1'%20d='M368.54,15.18l5.9-8.88h-52.48l-5.64,8.49-3.45,5.19-5.01,7.54h0s40.4,0,40.4,0l-2.82,4.24h-72.13c-2.23,0-3.07-1.46-1.87-3.27l9.11-13.71h29.5l5.95-8.49h-40.31l-5.64,8.49-9.61,14.46c-.36.55-.67,1.08-.92,1.61-.15.31-.28.61-.39.9-1.52,4.06.3,7.25,4.69,8.2.48.1.99.18,1.54.23.44.04.9.06,1.38.06h85.14l8.46-12.73,5.24-7.89h-40.45l2.95-4.44h40.45Z'/%3e%3cpath%20class='st1'%20d='M198.16,6.32c-.19,0-.37-.03-.56-.03h-60.45l-37.03,26.63h-19.71l18.01-26.63h-10.5l-17.48,26.31c-2.17,3.27.17,7.64,4.09,7.64h28.01l37.22-25.46h6.27l-16.92,25.46h10.51l16.92-25.46h27.83l-.02.04h7.11c1.89.18,2.56,1.55,1.44,3.23l-1.3,1.96c-1.2,1.8-3.98,3.27-6.21,3.27h-25.26l-11.28,16.98h10.5l5.64-8.49h15.69c.48,0,.96-.02,1.45-.06.61-.05,1.22-.12,1.84-.23,5.65-.95,11.72-4.14,15.59-8.2.02-.02.04-.04.06-.06.74-.78,5.18-7.47,5.57-8.39h17.48l-16.94,25.49h10.51l16.94-25.49h14.98l5.65-8.5h-55.64Z'/%3e%3c/svg%3e)
Formula Reiza V12: Extreme Downforce and the Braking Point That Changes Everything
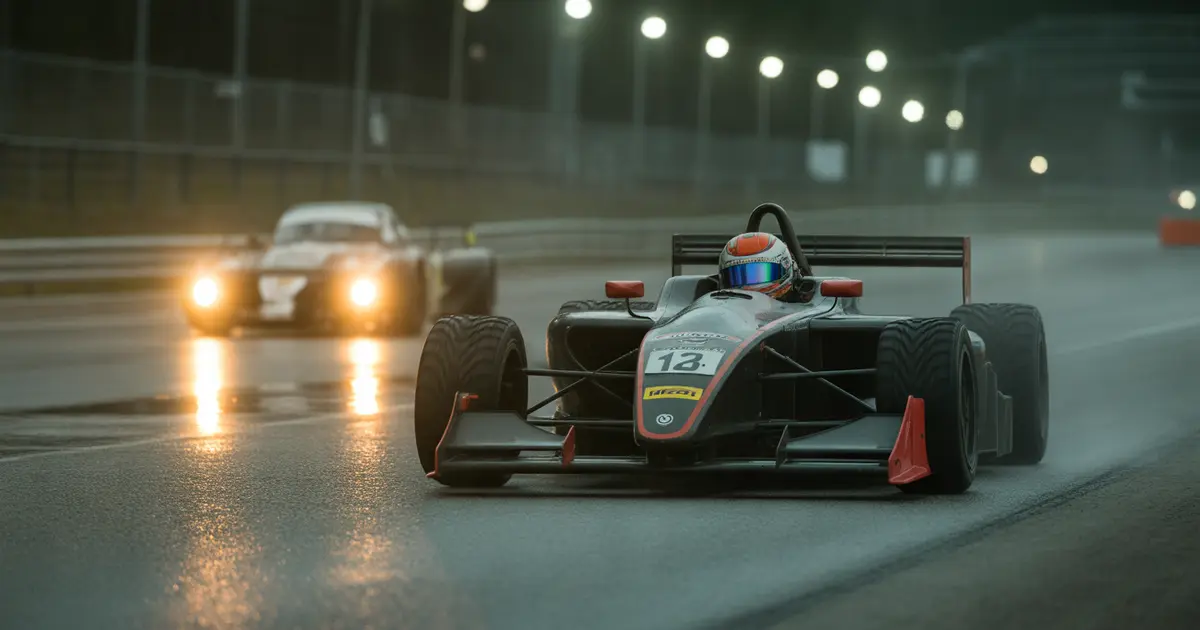
Why the braking point of Reiza's Formula V12 isn't a fixed distance but a pressure curve tied to speed — and where it shows up in your data.
In Reiza's Formula V12, extreme downforce pushes the braking point much later than in a GT3, but only in high-speed corners. In a slow corner or chicane, aerodynamic load has already dropped almost entirely, and the brake behaves almost like in a car without a wing.
This means there isn't a single “braking point” for this car. There's a pressure curve that needs to follow the falling speed. Anyone who treats the brake as an on-off trigger loses time in every fast corner on the track.
Why a Fixed Distance Is Deceptive in This Car
In low-downforce cars, the braking point is almost a track marker: that cone, that board, always the same spot. It works because the available grip varies little with speed.
In Reiza's V12, aerodynamic grip grows with the square of speed. This means that at 280 km/h you have braking reserve that simply doesn't exist at 150 km/h, even in the same corner.
That's why the right marker is no longer “brake at the 100 board.” It's reading how much load the rear still has when you ask for peak pressure. That's something you only see in the data, not in the feel of the rig.
What Changes in the Pedal Pressure Curve
The most common mistake for drivers coming from GT3 or Stock Car is applying almost constant brake pressure from start to finish of braking, with a slight drop near the apex. In this car, that drop needs to start earlier and be steeper.
As speed drops, downforce disappears fast, and the same pressure level that was safe at the start of braking ends up locking the front tire by the end of it. The braking peak happens early, while aerodynamic load is still present, and the release is progressive and continuous all the way to turn-in.
Where This Shows Up in Telemetry
Compare the brake pressure channel with the speed channel in the same braking zone. If the pressure curve stays nearly flat while speed is plummeting, it's a sign the release isn't keeping up with the loss of load.
The result in the data is usually a deceleration peak right at the start of braking and a short lockup, almost invisible on the replay, near the apex. This is exactly the pattern that locking the front wheel costs more time than braking early describes, except here the trigger is aerodynamic, not mechanical.
Fast Corners and Slow Corners Aren't Trained the Same Way
The same car, on the same track, calls for two different braking logics depending on entry speed. Treating both as the same skill is the most common way to lock up in one and brake too short in the other.
| Aspect | Fast Corner (High Load) | Slow Corner (Low Load) |
|---|---|---|
| Braking reference | Entry speed, not distance | Track distance, more stable |
| Main risk | Locking late, near the apex | Locking early, at the start of the press |
| Pressure shape | High peak and fast release | Lower and more constant peak |
The Mistake Reiza's Tire Model Exposes
The tire model used in Automobilista 2 punishes late release in a more visible way than other sims. The grip drop after a short lockup is felt in the rear on exit, not just in the front.
That's why many people think they lost time on traction, when the real problem started a few meters earlier, in the shape of the braking. Reiza's tire model reveals a mistake other sims hide in exactly this kind of chain reaction.
- 1High-Load Entry
Brakes applied hard while aerodynamics still support the tire.
- 2Pressure Peak
Point of maximum deceleration, still with aerodynamic grip in reserve.
- 3Progressive Release
Pressure drops continuously as speed and downforce decrease.
- 4Turn-In With Trail Braking
Residual brake releasing in proportion to the steering input applied.
- 5Exit
Brake already at zero, load transferred to traction without an abrupt step.
In the Formula V12, the right braking point isn't where you press the pedal — it's how pressure drops while the car decelerates.
How to Train This Tomorrow
Training this pressure curve requires repetition backed by data, not just loose laps. The goal is to build the feel of progressive release until it becomes automatic.
- Pick a reference fast corner and record five laps in a row without changing anything in the setup, to get a clean comparison baseline.
- Overlay the brake pressure channel from the fastest and slowest laps of the session and see where the slow lap's curve stays too flat.
- Mark the exact point where the pressure should already be dropping but isn't, using the speed channel as a cross-reference.
- Repeat the same corner trying to anticipate the release at just one point, without changing anything else on the next lap.
- Check whether the short lockup is gone by looking at the front wheel speed channel near the apex, not just the lap time.
It's worth checking the three channels you should check first in telemetry before adjusting the setup to compensate for a problem that's actually about driving technique.
When Trail Braking Enters the Equation
With high downforce, well-executed trail braking helps keep load on the front while the car turns in, but the ratio between releasing the brake and opening the wheel needs to be finer than in GT3.
Releasing too early loses the aerodynamic support that was still there. Releasing too slowly delays turn-in and extends the braking zone. The detail of releasing the brake in proportion to steering input becomes more critical here, not less.
How to Know if the Adjustment Worked
The most reliable sign isn't an isolated lap time, because a lap can improve due to lucky traffic or track evolution. The reliable sign is the consistency of the pressure curve's shape across laps.
- Pressure peak repeating at the same point indicates you're no longer guessing the braking zone every lap.
- Smooth speed drop, with no step in the middle of braking, shows the absence of a short lockup.
- A small gap between your best lap and your average lap is the indirect result of having fixed this pattern, not the cause.
When It Doesn't Work
If the car still locks up even with the correct release, the problem may lie in a brake bias set too far forward for this specific car, or tire pressure outside the operating window during the final phase of braking.
In that case, your driving adjustment has already reached the limit of what the current setup allows, and the next step is to adjust the bias before relying solely on technique.
Where Laptics Fits In
Laptics automatically records telemetry while you drive in Automobilista 2 and breaks braking down into phases, comparing your own laps against each other. This shows whether the pressure drop is happening early enough in each fast corner, without you having to build the overlay manually. The Driver DNA also points out whether this late-release pattern repeats across multiple tracks, not just the one you trained on.
Summary
In Reiza's Formula V12, the right braking point is a pressure curve tied to speed, not a fixed track marker. Treat fast and slow corners as distinct skills, check the shape of the pressure in your data, and only then think about setup.
Frequently asked questions
Why does the braking point of the Formula V12 change so much between corners?
Because downforce grows with the square of speed. In a fast corner there's much more aerodynamic grip available at the start of braking than in a slow corner, so the right reference is entry speed, not track distance.
Is locking the front tire near the apex always a mistake in initial pressure?
Not necessarily. In the Formula V12, this short lockup usually comes from releasing too late, when downforce has already dropped and pressure stays as high as it was at the start of braking.
Can you use the same trail braking style from a GT3 in this car?
The logic is the same, but the ratio needs to be finer. Brake release needs to keep up with the loss of aerodynamic load, which happens faster than in a low-downforce car.
How do I know if the problem is driving or setup?
If the car still locks up even when releasing the brake in the right proportion, review the brake bias and tire pressure before relying solely on technique.
Does track evolution affect this braking point?
Yes. More grip on track changes how much the tire can handle at the end of braking, so the exact release point can shift throughout the session.
What does Laptics show in this type of braking?
Laptics automatically records telemetry and compares your laps by phase of the corner, which helps show whether the brake pressure drop is happening early enough in fast corners.
Want to see this in your own telemetry?
I want to understand my braking with data